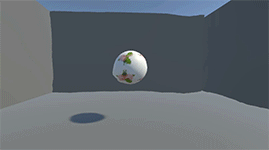
This is a post-processing image effect created using FullScreen Shader. To create a FullScreen Shader Graph, navigate to Create -> Shader Graph -> URP -> FullScreen Shader Graph.
Create a ‘Scene Color’ node and connect its output to the ‘Base Color’ input of the Fragment shader. The ‘Scene Color’ node will return the color of the current scene pixel/fragment.

To achieve the screen warp effect, we need to modify the UV of the ‘Scene Color’ node by adding a noise texture value that changes over time.
Create a ‘Time’ node and multiply it by a Vector2 value of (0.03, 0.4). Then, add the result to the ‘Screen Position’ node, which provides the UV values of the current screen. The output will be used as UV to sample a noise texture through the ‘Sample Texture 2D’ node. You can now see that the noise texture is animated with time.
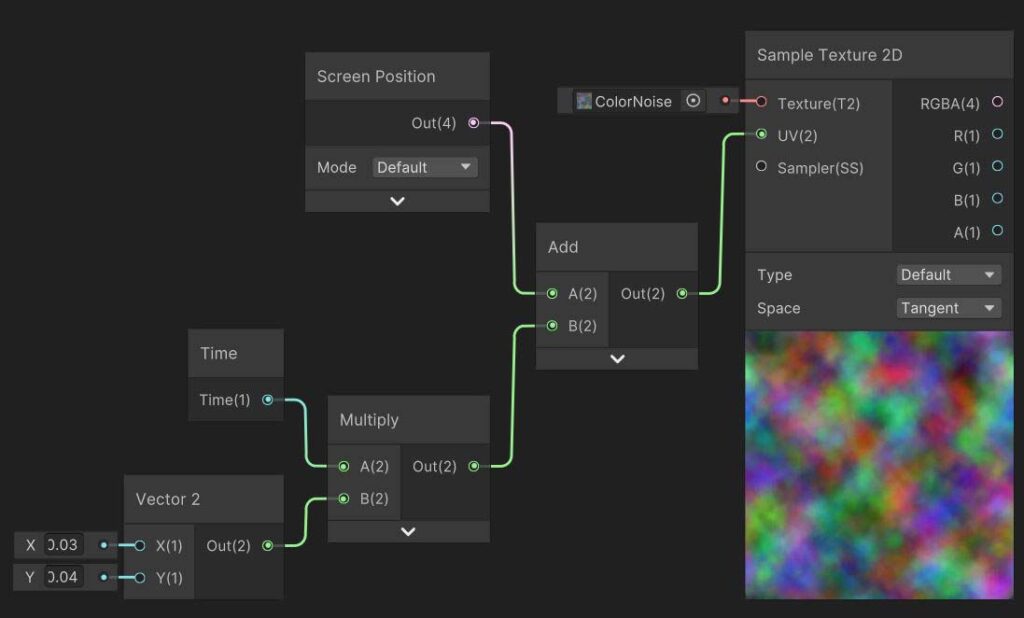
To achieve the desired result, we need to extract the ‘R’ component from the sampled texture output. Then, we should reduce the noise intensity by multiplying it with a value of 0.03. After that, we will add it with the ‘Screen Position’ node. Finally, we can use this as the UV input for the ‘Scene Color’ node.

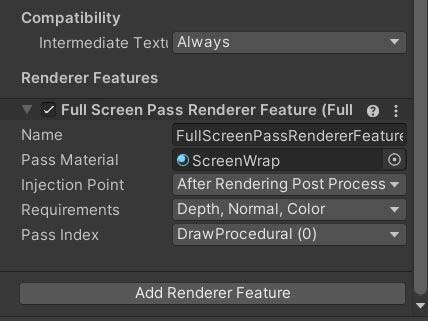
To visualize the post-process effect, assign the shader material to the ‘Full screen pass render feature’ in the URP renderer asset and enable it.