

In this shader, we are going to project a texture onto the surface of an object directly using its vertex position instead of its UV. This method will be very useful if we want to project a texture on a random object’s surface (e.g. Decal effect).
Unity already has a ‘Triplanar’ node, but we will create it ourselves to better understand the Triplanar projection.
Planar Projection
Let’s sample a texture using the XY value of the object’s vertex position. We will use the ‘Swizzle’ node to get the XY value from the ‘Position’ node.
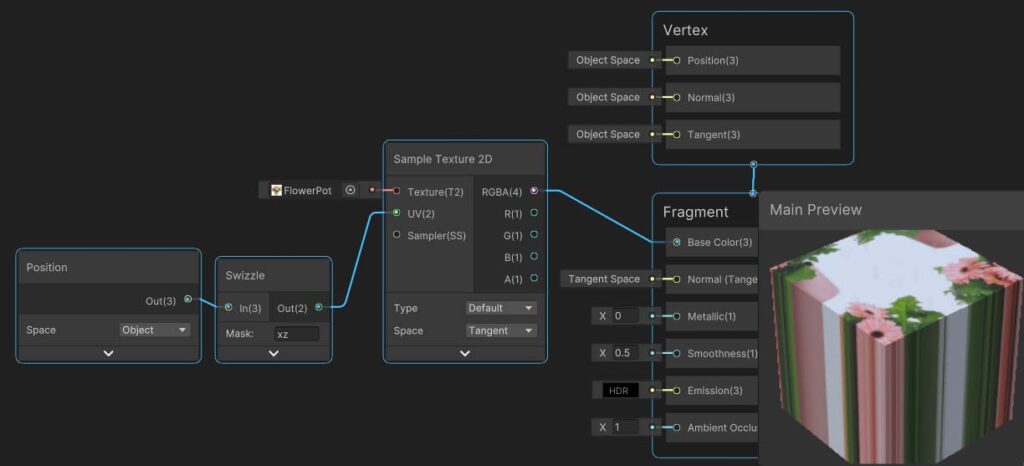


You can see that the texture has been projected well on the XZ plane (top and bottom) but seems to be stretched on the other planes. Let’s fix this using a technique called tri-planar projection.
Triplanar Projection
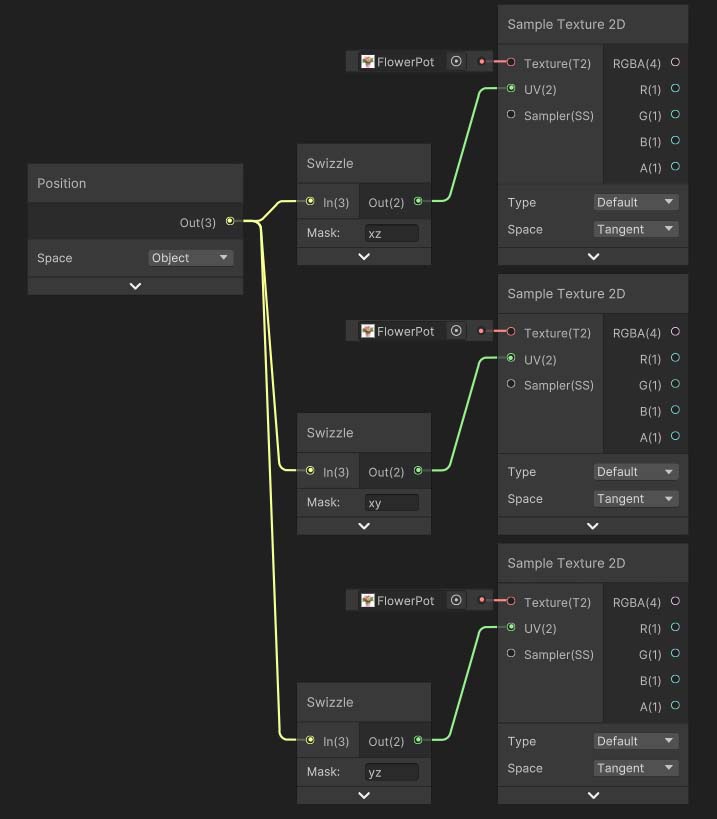
Here, we will sample the texture for all three planes – XZ, XY, and YZ.
We will use a ‘Lerp’ node to combine these textures. However, we need a mask that distinguishes the regions where each texture will be applied on each plane.
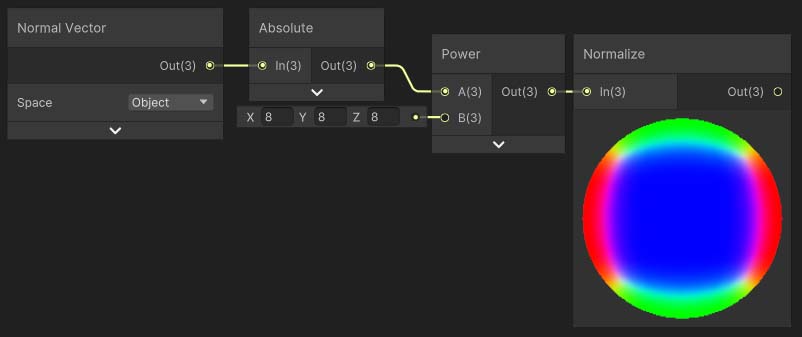
To create the mask, find the absolute value of the object normal, raise it to the power of 8, and normalize it. Now you will see each planar surface is well differentiated by R, G, and B values.
Now lerp each texture with the corresponding RGB value of this mask and assign the resulting output to the ‘Base Color’ of Fragment shader.
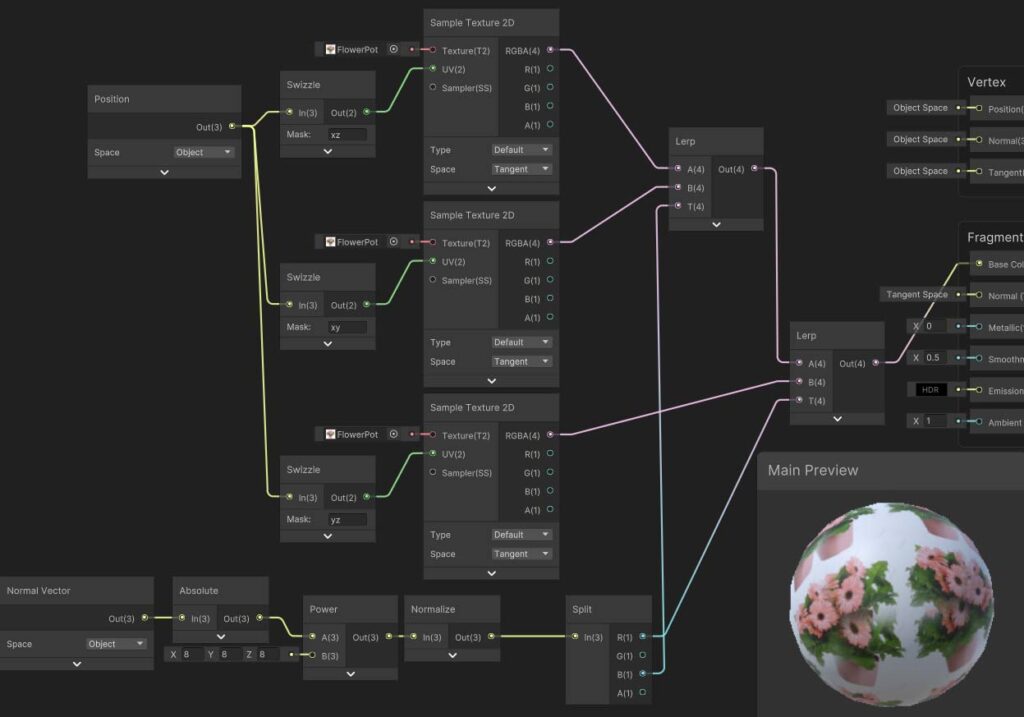
Our Triplanar projection shader is done! We can now use this technique to project a texture to any surface.