
Changing the Vertex Position
A shader can render the object at different positions on the screen by modifying its vertex position, although the object is actually located at a different position.
All we need to do is change the vertex position and assign it to the ‘Position’ input of the ‘Vertex’ shader in the master node.


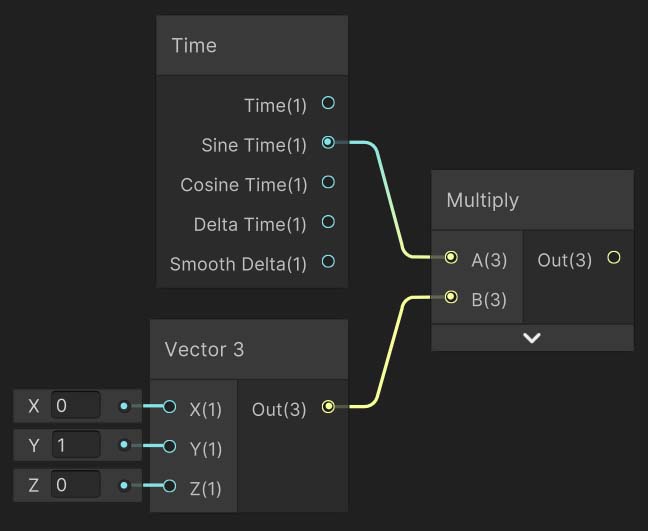
Let’s modify the vertex position in such a way that the object moves up and down periodically. To achieve this, we need to do sine operation with the ‘Time’ value. Fortunately, we have the ‘Sine Time’ output in the ‘Time’ node itself. Since we want only vertical displacement, we should make the X and Z components of the ‘Sine Time’ value zero and keep only the Y component. To do this we can multiply it with (0, 1, 0) vector.
Add this output with the ‘Position’ node (the ‘Position’ node gives the vertex position of our object) and assign it to the ‘Position’ input of the Vertex shader.

That’s it!
Our vertex displacement shader is done. You can see the object animating in the main preview.
Animating the texture
Additionally, I want to animate the textures also. We can just do the same technique as above but with a ‘UV’ node instead of a ‘Position’ node. Use this modified UV in the ‘Sample Texture 2D’ node and connect its output to the ‘Base Color’ input of the Fragment shader.
